James McCue Bobbitt’s Traditional Family Cuisine

Twenty Mile Vineyards
Laura Bobbitt Kuhn designed this logo to help inspire those participating in the crush one year. There is a bit more than an acre of grapes at the homestead. And of course, great wine is the perfect complement to great food. The following recipes are favorites, carefully selected and annotated by “Jim Notes”. Bon appetit!
“Twenty-Mile” was a West Virginia family colloquialism for someplace far away. The winery is, alas, no more.
My beloved papa, sadly, passed away recently on the cusp of becoming 92. He led a life of great joy and beauty, and loved to travel, share wine and good food with friends, and CHEMISTRY – not necessarily in that order. I will greatly miss his humor and friendship. Rest in peace, Papa.

Menu
- Mother B’s (Grace McCue Bobbitt) Plum Pudding
- Large Potato Pancakes
- Fake (or faux, If you prefer) Lox
- Home Fried Potatoes
- Cream Cheese and Flavored Cream Cheeses
- Various Pastas with Dried and Fresh Mushrooms
- Mother B’s (Grace McCue Bobbitt) Christmas Fruit Salad
- Atwoodville-Tuscan Bread (With Salt)
- Smoked Fish (Salmon or Bluefish)
- Mustard-Dill Mayonnaise
- Sally Lunn
- Pasta for One or Two
- On the Subject of Meat Sauces
- Mother B’s (Grace McCue Bobbitt) Light Bread
- McCue Cured Ham
- Grace McCue Bobbitt’s Fruit Cake
- Mother B’s (Grace McCue Bobbitt) Corn Bread
- Guittard Chocolate Chip Bars
- Grace’s Chocolate Cake
- Oatmeal Crispies *
- Pecan Pie *
- Snickerdoodles *
- Green Bean Casserole *
- Mother B’s Applesauce Cake *
- Fresh Cranberry Sauce *
- Dipping Sauce for Lobster *
- Painted Cookies (Glazed Fresh Apple Cookies) *
- Pecan Sticks *
- Dilly Bread *
- Lisa & Cecilia Hickman’s Texas Sheet Cake *
- Victorian Egg Board Pavlova *
* Not part of the original cookbook, these were added by a son with a sweet tooth, creating his own selection of family favorites.

Mother B’s (Grace McCue Bobbitt) Plum Pudding
Plum pudding has been a traditional Christmas dessert for many years, or at least since Charles Dickens. I would have to say, however, that the English plum puddings that I have tasted are not all that great. I think that this one is. At least one of the reasons is that it is made with butter rather than the more traditional beef suet (mother did not like suet!). It is very rich, but does not have as much fruit as the fruit cake recipe elsewhere in this cookbook. I have no idea where the recipe came from, but it is the only one that I have seen using butter.
We always had it for Christmas, served with hard sauce. We have also found that it is very good with a clear sugar sauce. Both recipes are given below.
Ingredients
- 1-1/2 cups of flour
- 1 cup butter
- 1 cup brown sugar
- 3 eggs, beaten
- 1 Tbsp baking soda
- 2/3 tsp salt
- 1 tsp cinnamon
- 1/4 tsp ground cloves
- 1/2 tsp nutmeg
- 1 cup raisins
- 1/2 cup currants
- 1 cup milk
- 1 cup plain bread crumbs
- 1 Tbsp lemon juice
- 1-1/2 pounds of candied fruit-cake fruit
- Mix the flour with the fruit-cake fruit, raisins, and currants so that all of the fruit is coated.
- Cream the sugar and butter together and add the beaten eggs.
- Combine the soda, salt, spices and bread crumbs.
- Mix the dry ingredients, the milk, and the butter-sugar-egg mixture, alternately.
- Add the lemon juice and mix well.
- Place into three coffee cans so that each is about 2/3 to 3/4 full.
- Tie a layer of waxed paper and a layer of aluminum foil (foil on top) over each can.
- Steam for 3-1/2 hours. (Place in a large kettle with some water in the bottom and cover).
- Always serve warm. The microwave works well.
Hard Sauce
Hard sauce is just softened butter into which one works as much powdered sugar as possible. A little vanilla extract is added at the end.
Cecelia Louise’s (Cecelia Dower Hickman, Jane Ann’s mother) Clear Sauce
Ingredients
- 1/2 cup sugar
- 1/2 Tbsp cornstarch
- 1/8 tsp salt
- 1 cup boiling water
- 1 Tbsp butter
- 1 tsp vanilla
- dash of nutmeg or cinnamon
- Mix sugar and cornstarch in a small saucepan. Add the boiling water slowly while stirring to get a smooth mixture.
- Heat to boiling and stir until the sauce thickens.
- Add the salt, vanilla and nutmeg or cinnamon.
- Serve warm.
Jim Notes
The plum puddings can be stored indefinitely in the coffee cans in a freezer. From time to time, we find one in the freezer that was forgotten long ago. It was good anyway. The foil and waxed paper should be replaced by plastic coffee can covers. In fact, the cake is so rich that one does not eat very much at one time. Freezing is almost a necessity.
The big problem was always how to get the plum pudding nice and warm. It would dry out in an oven, and steaming it again is a pain. Thanks to the marvels of microwaves, this is now easy. The desired amount of pudding can be placed in a sealable plastic bag and heated very gently in a microwave at low power until it is nicely warm.
The hard sauce should be served cold, but the clear sauce is better warmed.


Large Potato Pancakes
I am very fond of fried potatoes. Many years ago, we were privileged to spend a year in Zürich, Switzerland (studying chemistry). When we tried to read up on the culture a bit, we were told that there were very few really traditional Swiss dishes, but that one of the favorites was a fried potato dish known as rösti. This was sort of a large potato pancake, often flavored with onion or other spices. From that time, I have read many recipes for the dish and now believe that no two cooks make it the same way. Some use previously boiled potatoes (the safest), and others use freshly shredded potatoes (a little more tricky). At any rate, they are all fried in the end.
I finally worked out my own recipe that pleases me (although it may be like many others).
Ingredients
- any amount of shredded raw potatoes, but not more than will make a layer about 1/4 – 1/2 inch thick in a non-stick frying pan.
- about 1 Tbsp cooking oil or butter, according to diet or taste
- salt and pepper to taste
- cheese or herbs as desired
- Shred the potatoes roughly so that the shreds are something like 1/4 inch across. If new potatoes are used, the skins can be left on. As soon as the potatoes are shredded, put them in cold, salted water. If they are left out in the air for any time at all, they will take on a gray color and assume an off taste due to air oxidation. If you want a little more flavor, a tsp of balsamic vinegar can be added to the water.
- Take the largest non-stick frying pan that you can find and put about 1 Tbsp of cooking oil in it. Heat it until quite hot, but not smoking.
- While the pan is heating, remove the potatoes from the water and dry them as well as possible between layers of paper towels.
- Add the potatoes in small batches so that the surface of the pan is completely covered. With a cake turner, mash them into as thin a layer as possible. Salt and pepper to taste.
- Go around the edges of the pan with very small amounts of butter in such a way that you provide a nice crust around the edges with a good butter taste. The first side is done when the edges are well browned.
- The cake must now be turned over. I have found that, if it has not stuck to the pan, one can slide it off onto a flat surface of some sort. I use a large fairly flat skillet cover. Then, one can invert the frying pan over the cake and flip it back to cook the second side.
- At this point, one may want to add more butter around the edge and some more salt and pepper. I have also found that Parmesan cheese gives a nice taste.
- After the second side is cooked, the cake can be flipped back to reheat the first side or just removed and placed on paper towels for a very short time to get rid of any oil left (I do not bother). Serve immediately while it is crisp.
Jim Notes
When we prepare this dish, we always start with enough potatoes to feed several more people. Somehow, most of them seem to disappear.
This cake is best when it is very thin and the crispness is prominent. It is difficult to make for a large crowd. If it is too thick, the middle becomes a little too soft and “gushy.”
The recipe has many variations. As noted, cheese can be added. If half of the potatoes are put in the beginning, followed by a layer of thinly sliced onions and the rest of the potatoes, a potato-onion sandwich results that is quite good. If the onions are put in the potatoes at first, those onions on the outside of the pancake will burn.
Almost any other herbs can be added to change the flavor.
I like to serve the cake with applesauce, but no one else in my family seems to like it. They are crazy! (untrue – says son Sterling! Well, OK, we may be a little crazy – but I DO like it!)

Fake (or faux, if you prefer) Lox
l am very fond of the lox or cold smoked salmon that one can buy at a good supermarket. However, I am much too cheap to buy it, especially when the price of good salmon is low. I have tried a number of recipes for cured salmon, but they all seem to come out compact and very dry, whereas the supermarket product is lovely and moist.
I did see a recipe from a lady in Hawaii in which she used lap souchong tea as a flavoring, but I could not find it at our local market. Since I do not have a cold smoking device, I decided to try the product known as “liquid smoke.”
Ingredients
- A salmon filet weighing about 2 pounds
- Two cups of water
- 1/2 cup of Kosher salt
- 1/4 cup of brown sugar
- 1 tsp ground cardamom
- 1 tsp pepper corns
- Fresh dill or 1/2 tsp dill seed
- 1-1/2 Tbsp Wright’s Liquid Smoke
- Dissolve the sugar and salt in the water in a plastic bag.
- Add the dill, cardamom, liquid smoke, and pepper.
- Place the salmon in the bag and seal to keep as much air out as possible.
- Keep at room temperature (or in the refrigerator if you are nervous).
- After two days, taste for saltiness. If not enough, keep it for another day. I find that three days are about right.
- Remove the salmon, rinse well in cold water and pat dry.
- Slice as thin as possible and serve with cream cheese or just on a cracker.
Jim Notes
The salmon can be cut up into blocks and frozen. This improves the texture, and when the salmon is partially frozen, makes it easy to slice into very thin slices. Elsewhere in this cookbook, a recipe is given for hot-smoked salmon with dill mayonnaise. The dill mayonnaise is also very good with this cold variety. At least that is what my son, Sterling, says.
Home Fried Potatoes
I have always loved fried potatoes (or, in fact, most fried foods). However, in a lifetime of trying to fry potatoes, I have gotten burned ones, grease-soggy ones and many batches barely fit to eat. I may have found a good way to do this consistently, through the magic of paper towels! The recipe also lends itself to many variations.
Ingredients
- Any amount of potatoes, peeled and cut up into cubes about 1/2 inch in size and dried on paper towels.
- About one-third of a cup of oil, or enough to just cover the bottom of a pan.
- Salt to taste.
- Other ingredients such as cheese, onions, fresh herbs such as sage or rosemary.
- Heat the oil in a non-stick skillet on high heat until it is quite hot, almost smoking.
- Add the dried potato cubes, a handful at a time, watching out for the splatter.
- Stir, or shake, the potatoes almost continuously over high heat until they begin to brown.
- Turn the heat down to fairly low, and, using paper towels, wipe out all of the oil that you can. The pan should be essentially dry.
- Add salt and stir or shake from time to time while you prepare the rest of the meal. Keep the heat low enough or shake often enough that they do not burn.
- Add the additional ingredients during this last state. Parmigiana cheese is very good, but other cheeses are also delicious. Sliced onions add character. Fresh sage is also especially good.
- These are outstanding if served with applesauce, especially the home-made kind.
Jim Notes
I suggest that you start cooking the potatoes before preparing the rest of the meal. They require close attention in the beginning phase, and they will be good even after a fairly long time on low heat after the removal of excess oil.
The small amount of oil left in the skillet will be absorbed by the potatoes during the last stage of the cooking.
This process should produce dry, fairly oil- free, crisp potatoes. I have measured the loss of oil, and it is minimal. The trick is to dry the potato cubes fairly well and add them slowly to the hot oil.
We first observed the addition of cheese in Eastern France. They use a cheese that melts at a fairly low temperature, but I find that almost any cheese is good. Onions burn easily and should be added only after the high heat stage is finished. Sage and parsley fry beautifully and can even be fried directly in the hot oil if desired.
I am especially fond of applesauce with these potatoes. Although most people (especially my family) think I am crazy, think about it! Potato pancakes are usually served with apple sauce and are wonderful. There are even some recipes where the potatoes and apples are fried together.
Cream Cheese and Flavored Cream Cheeses
I owe this recipe mainly to the lovely Sisters Elizabeth, Lioba, and Chava from the Abbey of Regina Laudis in Bethlehem, Connecticut and to a remarkable book entitled “The Cheeses and Wines of England and France-With Notes of Irish Whiskey” by John Ehle (Harper and Row, N. Y. 1972).
Soft cheeses of all types delight me, but really none are all that much better than a good cream cheese. The substance is so variable that one can add about any flavor to it with good results. The nuns at the Abbey started me on this quest. The recipe is not exactly the one they showed me, but it is similar. Once again, the secret is in the use of paper towels!
Ingredients
- 3 quarts of “half and half” milk from the supermarket. This has been pasteurized.
- 1/4 tsp starter culture (EZAL MA019, see below) or 1 tbs of cultured buttermilk
- 1/4 tsp of rennet (DCI Supreme, see below)
- 3 scant tsp of kosher salt
- various added herbs and spices
- Allow the milk to warm to room temperature.
- Dissolve the starter and the rennet, separately, in small amounts of warm water and add to the milk.
- Stir gently for a few minutes and allow to sit at room temperature until it solidifies. This may take from 3 hours to overnight.
- Using a knife or spatula, cut the “cake” vertically into squares about 1 inch across. Using a large spool, take the cheese out in layers and place in a piece of clean cheesecloth in a kitchen colander.
- Allow it to drain for about 12 hours and then tie the cloth into a bundle and let it hang over a sink for another 12 hours.
- Place the semi-soft cheese in an electric mixer with the flat blade. Add the salt and beat thoroughly.
- At this point, you can add herbs or spices if desired. Chopped chives, garlic, or dried herbs are all possibilities.
- Place in molds of some kind and drain on paper towels. I have taken two shallow plastic Rubbermaid bowls and cut holes in the bottom. You can put the cheese in the molds and invert them over folded layers of paper towels so that the open top is on the towel with the small holes to let some air in from the top. The towels should be renewed every 6-8 hours. This can be done at room temperature. After a couple of changes, invert the small round cheeses and drain from the other side. In France, they use straw mats for drainage.
- The cheeses can be eaten at any time during the process. They will keep several weeks in the refrigerator, but DO NOT FREEZE WELL.
Jim Notes
There are two commercial sources for the starter and rennet used in the recipe. The materials described above were actually obtained from
Dairy Connection, Inc.
8616 Fairway Place #101
Middleton, WI 53562
Telephone: (608) 836-0464
Another supply house that has a good book on cheesemaking and is a smaller operation is
New England Cheesemaking Supply Co.
85 Main St.
Ashfield, MA 01330
Telephone: (413) 628-3808
The cheese made from this recipe is fairly rich with so much cream. If you use much less cream, you obtain a crumbly cheese more reminiscent of cottage cheese. If you use a higher percentage of cream, it is almost too rich for me.
In the book mentioned at the beginning of this recipe, the various things that can be done at the end of the described process are explained. The possibilities are infinite.
There are actually two steps in the process. One is brought about by the “starter” culture and is a process of making lactic acid and making the cheese sour. Without this, the cheese would be excessively bland. The second is the coagulation caused by rennet, which allows the milk proteins to be separated from the liquid or whey.
During the drainage procedures, the cheese will become less sour and salty as the whey is removed. You can stop the drainage whenever you like the taste and consistency.
It is possible that the product is a little different in the winter than in the summer. In the summer, it seemed creamier. In the winter it seems dryer. I do not know why.

Various Pastas with Dried and Fresh Mushrooms
Dried mushrooms, especially dried porcini, have an intense smoky flavor that is lacking in fresh mushrooms. I like the contrast between dried and fresh mushrooms, especially fresh wild mushrooms (from a good supermarket). In this recipe, the dried mushrooms are allowed to steep and hydrate in warm heavy cream, while the fresh mushrooms are fried with bacon and onion and seasoned with sherry, chicken broth and balsamic vinegar.
Ideally, one would make ravioli from homemade pasta, stuff it with the wild mushroom mix and use the cream for a sauce. However, the cream and fried mushroom mixture can simply be combined and served over any available pastas.
Ingredients
For the cream sauce.
- 1 cup of heavy cream
- 1/2 cup of crushed, dried mushrooms, in pieces, not powder.
For the fresh mushroom mixture
- Six slices of bacon, chopped
- 2 cups of mushrooms, preferable wild such as shitaki, brown, and oyster, finely chopped
- 1/2 cup finely chopped onion
- 1/2 cup chicken broth
- 2 Tbsp cream sherry, or dry sherry plus 1 tsp brown sugar
- 1 Tbsp balsamic vinegar
- Salt and pepper to taste
- Add the dried mushrooms to the heavy cream and heat in the microwave until it just comes to a boil. Allow to stand for several hours before use. If desired, you can re-warm the cream from time to time.
- Fry the chopped bacon until it is well browned.
- Add the onion and cook until it becomes soft and transparent.
- Add the mushrooms and brown well.
- Add chicken broth, sherry and balsamic vinegar and slowly simmer until almost all of the liquid is gone. This will give a fairly dry mixture for use in filling ravioli. Salt and pepper to taste. Add more vinegar if desired.
- You can make homemade pasta for ravioli (or any other kind of stuffed pasta) or use wrappers from the supermarket, usually used for Chinese cooking. The homemade pasta should be rolled out very thin. I like very large ravioli.
- Cook the pasta or ravioli in the usual way. If plain pasta is used, sauce it with the fried mixture and warmed cream sauce. If necessary, add more liquid from the pasta water. If ravioli are used, pour the warmed cream sauce over the cooked raviolis and serve.
Jim Notes
The actual amounts of the various ingredients are not crucial. The product will be very good almost no matter what you do.
A clove of garlic, finely chopped and warmed with the cream portion, adds another flavor.
In the summer with many fresh herbs available, I often take a mixture, chop it very fine and add it to the fried mushrooms. Sage, tarragon and rosemary are very good.
I like large ravioli, made from very thin pasta, perhaps 3-4 inches square. These are not so easy to cook since they may fall apart or “leak” if the water is boiling too vigorously. However, the taste is the same. It does not take too many of these to make a good meal.

Mother B’s (Grace McCue Bobbitt) Christmas Fruit Salad
I don’t know just where this recipe came from, but it may have come through the Mahood family in Princeton or the Greer family in Fairmont through one of my aunts. It has been tradition for Thanksgiving and Christmas for many years and has thoroughly confused many guests. We serve it during the dinner, to break up the naturally heavy nature of the meal, but guests don’t know when to eat it.

Ingredients
- 2 packages of Knox unflavored gelatin
- 1 cup cold water
- 2 cups boiling water
- 1 cup sugar
- juice of 3 lemons
- green food coloring
- 1-1/4 pounds of grapes. The big brown Malaga type with seeds used to be ideal, but they no longer seem to be available. Use some grapes with a decided flavor other than Concord, but not Thompson seedless white ones.
- 3 bananas
- Maraschino cherries
- 3/4 pounds of nuts, usually English walnuts
- Pour the cold water over the gelatin and let it stand for 30 minutes.
- Add boiling water, sugar, lemon juice and coloring and allow to cool until it begins to gel. The amount of coloring is variable unless you have one of the McCue green mixing bowls. It should be the color of the bowl or at least a nice bright green.
- After the gelatin has begun to set, remove seeds from the grapes if necessary and cut them in half, cut up the bananas and cherries to about the same size, and chop the nuts so that each meat is about 1/8th. The number of cherries also seems to be variable. We use a small bottle and drain them before addition.
- When the gelatin has partially gelled, add the fruit and cool to complete the gelation.
Jim Notes
Mother’s comment, always given at some time during the meal was, “Isn’t this refreshing?”
It actually seems to get better as a “leftover.” There is always a quiet rejoicing in the family when people do not eat it all.
I do have one major suggestion. Do not give a little boy all that he wants to eat at one time. The results were catastrophic.
When we were in Switzerland in 1959, we prepared this salad for Thanksgiving dinner. However, the “pure” gelatin that was sold to us contained a lot of salt. Unfortunately, we did not notice it until the whole batch was mixed up. However, we washed as much of the gelatin off as possible and put the fruit in lime Jello. It was not nearly as good, but was the best we could do. The tart flavor of the lemons is quite necessary.
John Notes
My cousin Helen reports that her mother Beatrice said this recipe came from Aunt Ruth.

Atwoodville-Tuscan Bread (With Salt)
James M. Bobbitt
The following recipe is still evolving, but it does show some of the things that I have learned about the making of bread. This is like some of the Italian breads except that they put little or no salt in most of theirs.
Ingredients
- 2 cups of starter (see below)
- 3 cups of warm water
- 1 cup of whole wheat flour
- about 6-1/2 cups of all-purpose flour
- 1/4 cup of warm water for 1 tablespoon of dry yeast or one package
- about 2 tablespoons of dark or light Karo syrup
- The day before, combine the 2 cups of starter, the whole wheat flour, 2 cups of flour and 3 cups of warm water. Cover with plastic wrap and allow to stand in a warm place for 12-15 hr. This is the sponge or poolish in French.
- When you are ready to make the bread, mix the yeast in 1/4 cup of warm water and allow it to get foamy.
- Put 2 cups of the sponge back in a container and place it in the refrigerator for next time. Thus, the net amount of water used is 3 cups.
- Add the Karo to the mix. I “wash the spoon” in the yeast mixture to give the yeast a jump start.
- Add the yeast to the sponge.
- Add 3 cups of flour and mix with a dough hook until smooth.
- Add the salt. Salt inhibits the action of yeast to some extent and should be added later rather than sooner in the mixing process.
- Add about 1-1/2 cups more of flour and mix until the dough becomes a little cohesive and pulls away from the side of the bowl. The amount of flour is variable. Use less rather than more and the bread will be moist and have a larger-pore, more-open structure. I try to get a light dough that is just a little too sticky to knead easily.
- Remove the dough and knead briefly until it is smooth. You will have to use a bit more flour, but use as little as possible.
- Spread a copious amount of corn meal on a baking sheet (I have a heavy, black sheet which seems to be ideal). Make a ball of the dough and place it in the middle. Flour the ball generously and cover it with a dish towel (not plastic, it will stick for sure).
In order to keep the loaf small, I then put the top of a demountable spring-form, cheese-cake pan around the outside of the towel and lock it closed (this was suggested by Jane Ann; I have also seen the dough just wrapped tightly in a cloth). Pull out the towel at the top to make it blousy and allow the dough to expand. - Allow the dough to rise for 1-2 hours or until it comes out well over the top of the spring-form pan. You have to keep an eye on it to see that the pan does not ride up with the dough and allow it to sneak out at the bottom.
- Open the spring form pan and remove the towel. The round loaf will sag into a round, slightly flat mass. Score the top as you wish with a single-edge razor blade.
- Put it into a preheated 400° oven and spray it well with water. The water spray may or may not be required. Bake for about 50 minutes or until it sounds hollow when you tap it. This is Jane Ann’s main contribution; she taps!
Jim Notes
First of all, don’t get up-tight about making bread. You can do many things, and it will be very good. Absolute failures do happen, but are rare.
It is easy to make larger or smaller batches of dough. The overall-all ratios are 1 part of water, 2-1/2 parts of flour, 1 rounded teaspoon of salt per cup of water, and whatever yeast you desire. The sugar syrup may add nothing, and is optional.
The starter mixture that I use has a long and wild history. It started life with a culture “caught” by one of the ladies that worked in the “blue truck” that sells snacks at the University. At one time or another, I have added yogurt, sour cream, beer, and anything else that looked interesting to me. I have been using it for several years.
If you like it, I will give you a pint to get started. Or, you can get your own from several sources. The one that I have will separate over a week’s time to give a layer of clear, light brown liquid on top. I just mix this in when I use it. You can drink it if you want; it is alcoholic.
Flavor in bread develops with time and the microbial action in the starter, or even in a plain yeast mixture. The longer the sponge or even the dough sits around, the more flavor.
The amount of whole wheat flour is variable. I like just a little. Actually, “King Arthur” makes a so-called white whole wheat flour that is excellent. You may want to use it in greater or lesser quantities.
The amount of yeast is also variable. If you use a small amount (say, 1 teaspoon), it will take longer for the bread to rise, but you will have more flavor. With 2 tablespoons of yeast, the rise is quite rapid, and the flavor, because of the sponge, is still good. I have even made it without yeast entirely. It takes forever to rise, but gives a very dense loaf with a lot of taste.
I like to make the round loaf as described because it is so beautiful, but the recipe makes good rolls and even long thin loaves. However, I somehow think that the large round loaf tastes better-good imagination!
This bread contains no fat and very little sugar. Therefore, it will go stale faster than other bread. We eat as much as we can soon after it comes out of the oven and then slice the rest up, put it in plastic bags and freeze it. We thaw it in an oven or toaster oven–NOT A MICROWAVE OVEN.
Smoked Fish (Salmon or Bluefish)
This is a recipe worked out by our good friend and neighbor, Carol Moulton, who works at the UCONN Library. She always brings some to our harvest party, where it lasts a very short time indeed.
- Soak the fish filets in a rinsing brine of 2 tablespoons of salt in 1 quart of water for about 30 minutes.
- Transfer the fish to a new brine containing (per quart of water) 1/4 cup salt, 2 tablespoons of sugar, 1 teaspoon of fresh ground pepper, and 1 teaspoon of crushed cardamom.
- After 2-4 hours in the brine, remove the fish and pat it dry. Allow it to dry in a good air circulation. This can be done in a refrigerator overnight or even for an hour or so at room temperature.
- Sprinkle the fish with good whisky or brandy and equal parts of sugar and salt (I go very easy on the salt). Add another seasoning if you like.
- Smoke for 15-20 minutes over applewood or some other fruit wood. This is the tricky part and a major part of the magic of the recipe. For the smoker pan, we have taken an old, enamel turkey-roasting pan with a fairly tight top and placed a couple of tin cans open at both ends to hold up a wire rack which just fits the pan. The rack is 3-4 inches or so above the bottom of the pan. If you have no old pan that you can dedicate for this use, buy a new one, because they are almost impossible to clean. Carol does suggest that you might put a layer of foil in the bottom of the pan if you ever expect to get it clean again.
- Serve with the mustard-dill mayonnaise described below and a cracker.
Jim Notes
We use some apple chips in the bottom of the pan and sometimes grape vine cuttings. I will be happy to provide you with a lifetime supply of grapevine cuttings. (Ed. My father may rescind this offer, having decided to remove the vines that swarmed his property and purchase grapes for his wine-making, instead. Growing grapes is a labor of love, with the emphasis on labor!)
For the heat source, we use a two-burner Coleman stove outside turned as hot as it will go, but I don’t see why a good hot grill would not work just as well. Carol suggests that you not do this inside unless you want your house to smell like a kipper.
I am not sure about the timing. Carol says that it should be smoked until it flakes and takes on a nice caramel color, but this color will depend somewhat on the sugar. The time will also depend on the stove, which should be hot enough to furnish a good bit of smoke. Carol also suggests that the cover be opened now and then to let moisture out. I am casual about this. Actually, the fish will be wonderful no matter what you do in this step.
I think that the various times of soaking or drying are minimal and somewhat arbitrary.
I commented on the cooking time above, but it is a little long for me. I like my fish done just to the point where it begins to flake. I am trying some experiments in heating up the smoker first before putting in the fish so that it is well smoked but not overcooked. In fact, much of the commercial smoked salmon seems to be cold smoked so that it is almost raw. I don’t like that too much either.
We have used mostly salmon and have smoked a whole side, or whatever will fit in the pan. We have also smoked bluefish. I rather like the bluefish better because it has a stronger natural flavor which takes the smoke well. However, most other people seem to like salmon better. We have not tried any other kind of fish.
The pan problem deserves further comment. I think that you will like this so well that you will make it often and that a dedicated pan will be well justified (Just check the price of smoked salmon!).
John Notes:
We made two batches of this delicacy over the holidays (2019-2020). It was delicious, but I thought I would add that we smoked it for nearly four times the specified time – about one hour. The smoking process was repeatedly interrupted by basting with the whiskey mixture (think turkey). My father said it should look “mahogany” when done, which seemed vague but reassured me as I kept basting away. I made a healthy amount of the whiskey mix, featuring Chivas Regal which seemed a worthy investment. One other magic ingredient; as I lifted the pan lid and steam swarmed up, snowflakes fell on the salmon in an almost magical manner. My mother, our official taster, proclaimed it some of the best ever. I’m sure it was the snowflakes!

Mustard-Dill Mayonnaise
This is a commercial sauce, but I have forgotten where the recipe came from. I am also not sure whether I like the sauce or the fish better. Certainly the combination is superb, but I am not too sure about the fish without the sauce.
Ingredients
- 3-1/2 tablespoons of Dijon mustard
- 1 teaspoon of powdered mustard
- 2-1/2 tablespoons of sugar
- 1-1/2 tablespoons of white vinegar
- 1 cup of safflower or vegetable oil (Carol says that olive oil is too rich)
- 3 tablespoons of chopped fresh dill
Combine mustards, sugar, vinegar and blend well. I use a Waring blender. Slowly add the oil while blending. Stir in the dill, blend briefly and place in the refrigerator until ready to eat.
John Notes
For my taste, the oil is still too much – and I love mustard. So -next time I plan to switch the amounts for oil and mustard and hope the result adds just what the salmon needs.

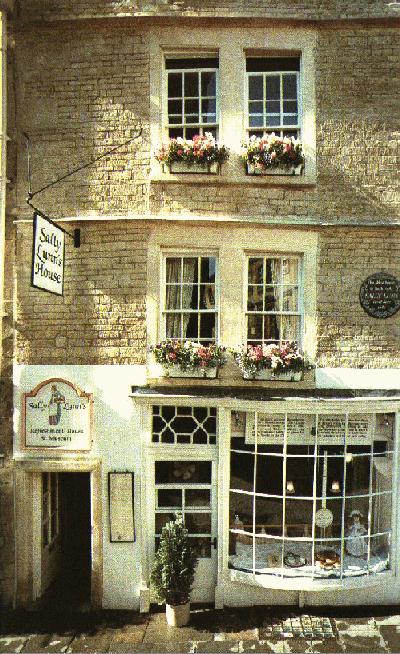
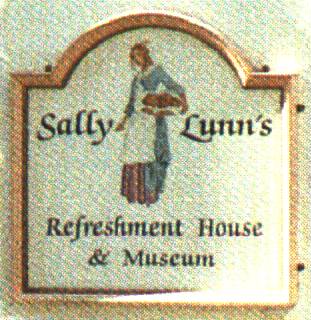
Sally Lunn
When I was a teenager, I visited my Aunt Jessie Mahood in Oak Ridge, Tennessee. We all then drove down to Nashville to visit one of her friends. At a dinner party, there was this beautiful mound of bread that looked like an angel food cake. It tasted better. The pieces were small because of the large group, and I would have tried to steal another piece if I had not been a guest. She told me that it was a “Sally Lunn,” and from that time on, I looked for a good recipe. There are many, because almost all bread cookbooks have one. However, none made anything comparable to the Memphis loaf.
Finally, I found one in the Magazine section of the New York Times that was great. I made it several times and promptly lost the precious recipe. A trip to the library and a search through many back copies finally yielded it again.
Jane Ann feels that the bread is too sweet, and I have modified it a bit to use white Karo syrup instead of some of the sugar. For even less sweet bread, all of the sugar can be Karo. (Karo syrup is almost pure glucose, which is not a very sweet sugar, although it provides good nourishment for the yeast). Note the parentheses below for my modifications.
Ingredients
- 1 envelope of dry active yeast (1 tablespoon of Red Star dry yeast)
- 1/4 cup warm water
- 1 cup milk, scalded
- 1/2 cup butter, one stick
- 1/4 cup sugar (2 tablespoons sugar and 2 tablespoons white Karo)
- 3 eggs, beaten
- 4 cups flour, approximately
- 1 teaspoon salt (rounded)
- Place the stick of butter and sugars in a cup of milk and heat carefully until the butter is just melted.
- Dissolve the yeast in the warm water (and add a bit of honey to give it a good start).
- Beat the three eggs in a mixer (with a beater blade, not a dough hook) and add the milk mixture. If it appears to be too warm, add a cup of the flour. Stir, and add the yeast mixture.
- Gradually add the flour and beat (still beater blade) at medium speed. After all the flour is added, beat for a few minutes and add the salt. The mixture should be a heavy batter, rather than a real dough. It may well pull away from the sides of the bowl if mixed at high speed, and it will become quite elastic. Usually the beating lasts, maybe, 5 minutes. At this point, I simply clean off the beater into the mixing bowl and cover it with plastic wrap for the first rising. One could put it into a clean, greased bowl if one were more energetic.
- After it has doubled, or more, stir the batter down and pour it into a well buttered angel food cake pan. The batter should be spread as evenly as possible over the bottom of the pan. I then place it into a slightly warm oven that has been sprayed with a bit of water to give a good damp atmosphere. I usually cover the pan with a damp cloth but try to remove it before the batter gets to the top of the pan. This usually takes less than an hour.
- When the dough has risen to the top of the angel food cake pan or a bit over, raise the temperature of the oven to 325°, and bake the loaf for 50 minutes. If you are lucky, it will rise well out of the pan. At this point, try to avoid jarring the stove too much or the loaf may fall. If this happens, it tastes good, but doesn’t look very nice.
- Take the loaf out of the pan by cutting down the sides and then the bottom. This works better if the angel food cake pan is the kind that is in two parts. If the bottom is not nicely brown, put it back in the oven for five more minutes. If all has gone well, the bread will be mostly air with a delicious brown crust.
- At this point, show it off to guests, or anyone else around. It will be much admired.
Jim Notes
The bread should be served warm. If it must be baked ahead of time, it will warm nicely in an oven at about 250° for a few minutes. If not all eaten, it can be cut into thick slices and frozen for breakfast. The frozen slices thaw nicely and warm through in a toaster oven at 300° for 10 minutes or so.
Sally Lunn is a very rich bread. I like to add more butter, but there are those who maintain that it has quite enough. A bit of strawberry preserves improves it also.
I have also made it in normal bread pans. It tastes the same, but the loaf is not so spectacular. It is easier to slice.
There are various stories about the source of Sally Lunn. It is generally stated that it was named after a lady named Sally Lunn in Bath, England. Ms. Lunn is supposed to have baked the bread, sliced it into thick slices, buttered it (again), put it back together and delivered it hot to homes of the wealthy. What a way to live!

Pasta for One or Two
I am a little like Will Rogers. He never met a man he didn’t like, and I never met a pasta that I didn’t like. However, making pasta for a meal sometimes becomes a production. One must use a large pan of water to cook it in, and one always uses too much pasta. One makes sauce in another pan, and so forth. In general the result is a lot of dishes to wash and a lot of pasta for leftovers or for freezing.
Therefore, I have developed a new recipe that violates all of the classic rules for making pasta, but is simple, fast, and doesn’t yield leftovers (or not too much, anyway).
So far, I have only used simple cream sauces, but others should work.
- First, prepare the sauce. An hour or so before cooking the pasta, put some type of herb of flavor into some heavy cream. This cream mixture can then be warmed in the microwave a bit to help extract the flavor. So far, I have used chopped onion, chopped fresh sage, and, best of all, some dried porcini, not all together, but in separate experiments. However, the possibilities are infinite.
- In a saucepan or frying pan with a fairly close fitting lid, place as much dry pasta as you think you can eat. Long thin shapes work best. Break them so that they lie flat on the bottom of the pan.
- Cover with chicken stock, commercial or homemade. This is a source of salt, so add a smaller amount of stock if you want it less salty. Use water to make up the difference.
- Cover and simmer the pasta and stock until the pasta is cooked to the desired degree. This is tricky and requires close attention toward the end. Toward the end, the pasta is rapidly taking up liquid, and you are losing some to evaporation. Therefore, you must watch it constantly and add more water to keep it from burning. A thick bottom pan can help here.
- When the pasta is almost done, add the cream sauce and heat through well. In one experiment, we added small scallops and cooked them gently until they were opaque. The combination was good.
Jim Notes
I can’t really see why purists would object too much to this recipe. The main difference is that one is not extracting starch from the pasta as one would do in a large amount of water. In fact, the starch comes out in the cooking and forms a sort of thick sauce toward the end–and burns very easily.
AND, one is left to wash only one small pan and a cup of some sort in which the sauce was made.
In theory, one could add some salsa, or butter, or mix some butter in with the cream.
On the Subject of Meat Sauces
Meat sauces are the intensely flavored liquids added to cooked meats to moisten them and add flavor. They can be infinitely varied depending on the meat and the flavor or herbs desired. There are very good sauces and ones that aren’t so great, However, in my opinion, in most cases, any sauce is better than none!
In general, sauces consist of meat flavor, salt, something tart, perhaps something a bit sweet, and some intense flavor derived from herbs or liquor of some type. I am reminded a little of one of the old “Gun Smoke” programs on TV. In one of them, Marshall Dillon said something to his sidekick, Chester, about making some coffee. Chester, with a very serious expression, said, “Oh, Marshall Dillon, ye don’t make cowfee, ye build a pot”. However, “building” a sauce isn’t so bad.
The meat flavor is generally obtained from the bits of meat that are left in the cooking pan and are partly burned. The burning breaks down some of the protein to give small peptides which are said to be the flavors. For this reason, it is not a good idea to use a non-stick pan. If a lot of fat is left after cooking, most of it should be removed. However, a little is needed.
In many cases, chopped onions or even better, shallots, are added to the hot pan with a little fat after the meat has been taken out. Finely chopped celery or even carrot can be used. If garlic is added, it should be added later because the garlic flavor is quickly destroyed on cooking. These should be cooked until transparent or even slightly browned. This is sort of a flavor base. Herbs, such as parsley or sage will stand up to the cooking and can be added. Garlic should be added at the end.
At this point, some water base liquid is added. I usually add chicken stock. It is best to use homemade stock, but I use commercial. Scrape the bits of burned meat and vegetables into the liquid. The chicken stock adds flavor and, generally, salt. Some say that the stock should be cooked down to a few tablespoons of volume before anything else is added. Maybe this is true, but I generally don’t bother.
Either along with the stock or after it has been evaporated, wine of some kind should be added. For white meats like chicken, veal, pork, or seafood, white table wine is added. This gives some tartness and still more flavor. Sherry is also good but has a distinctive flavor. For beef or game, a hardy red wine is the best.
Herbs of all types can be added, tarragon for chicken, dill or chervil for fish, rosemary for pork or whatever you like the best. Crushed peppercorns that have been simmered for a few minutes in water to soften them go well with beef. Crushed juniper berries go well with pork if you have any. Sometimes, I just go to the herb garden and bring in a bit of everything that I can find. A very small amount of balsamic vinegar or flavored vinegar of some type adds an interesting taste and a bit of tartness. Pernot will add a nice bit of anise to pork and orange liquor or even fresh orange juice can enhance many things. Imagination and daring are the keys to success at this point.
This should be cooked down to a small volume, really just about enough to cover the amount of meat to be served. At this point, taste it and correct the flavor. If sugar is needed, I usually add cream sherry and cook it a bit more. Often salt is needed, and always a little pepper.
For the preparation time of the sauce, it is necessary to have some way to keep the meat warm. I generally put a fireproof plate on top of a pan of boiling water as sort of a hot plate. The cooking down should be done on the highest heat, and one must watch it constantly.
Most, but not all sauces, are “finished” at this point with butter or heavy cream. The butter should be added to the boiling sauce in small amounts and whisked in. Herb flavored butters are ideal for this. The sauce will thicken. Cream can be used for the same purpose, but should be cooked a short time after being added. Even a very small amount of cornstarch in cold water can be used to give the sauce a little body. Or, the sauce can simply be used with nothing else added.
Mother B’s (Grace McCue Bobbitt) Light Bread
For most of my life, mother made all of the bread that we ate. Of course, I liked store-bought bread better, but there wasn’t much choice. After Jane Ann and I were married, she made bread much of the time. Eventually, we switched to a less rich French-type bread which we still make all the time.

This bread is a rich bread, but not as rich as the Sally Lunn described elsewhere in this cook book. It is probably not for someone on a strict diet.
As noted at the end, the dough is quite versatile and can be used to make many other types of bread.
Ingredients
- 2 cups milk
- 1/2 cups warm water (to dissolve the yeast)
- 1/4 cups sugar
- 1/4 cups fat, mother used Crisco, but Jane Ann has often used vegetable oil. It doesn’t seem to make much difference.
- 1 tablespoon salt
- 1 cake of dried yeast (or 1 tablespoon freeze dried yeast)
- about 6 cups of flour
- Dissolve the yeast in 1/2 cup warm water. I usually add a dab of honey to this to get it started, but mother didn’t.
- Heat the milk, but not to boiling.
- Combine milk, sugar, yeast, salt, and fat, and add flour to make a soft dough.
- Turn out on a board and knead until nice and smooth. The dough should be quite soft and rather more moist than dry.
- Put into a lightly greased bowl, cover with a moist towel and let rise until doubled. Then, stir it down and repeat the rise a second time.
- Work the dough down, divide it and put it into pans. Mother used two large bread pans and one small one. The pans should be only about 1/3rd full.
- Let rise until the dough reaches the top of the pan and bake in a preheated 400° oven for about 40 minutes.
Jim Notes
Because this bread contains milk and fat, it will stay fresh for a couple of days. Otherwise, it should be put into a freezer as soon as possible.
The bread contains very little sugar, but if it is still too sweet, substitute white Karo syrup for part or all of the sugar.
Although mother and Jane Ann usually made loaves with this recipe, it was also used to make hot rolls of all types. Mother favored a Parker House shape. As any right-minded person knows, there is no such thing as a fine dinner in the South without hot rolls.
The dough can also be made into beautiful cinnamon rolls, generally known as “sticky rolls” in our house. The dough is rolled out until it is about 1/3rd inch thick and dusted with cinnamon and sugar. It is rolled up and cut into circles about an inch thick. Brown sugar and pecans, preferably a lot of pecans, are melted together in a cake pan, and the circles are placed on top. The rolls are allowed to rise and baked at 400° until done.
McCue Cured Ham
In various parts of the United States, there are many ways to cure ham or bacon. This is the one that I grew up with because it is the one the McCue family (my mother’s family) always used. I have no idea where it came from. It is a completely dry cure with no smoke. I must admit that it is a bit of an acquired taste, but I like it very much. I have found only one or two of the fancy cured commercial hams that are comparable.
Ingredients for 25 pounds of meat
- 2 cups of salt (see important note below)
- 3 tablespoons of brown sugar
- 2 tablespoons of black pepper
- 1 tablespoon of red pepper
- Mix the curing ingredients well, usually with your hands.
- Pat the cure mixture on the cut parts of the ham, shoulder, or bacon.
- Wrap tightly and tie with string in layers of newspaper so that the cure is held in place.
- Put in clean cloth bags so that the most open part of the cut meat will be up when the bag is hung. Bacon can be done with two “sides” wrapped together.
- Hang the bags in a cool dry place for 3-4 months. I am not sure about freezing, but I don’t think it will hurt it.
- Open, wash off the mold and use as needed. If not used, it can be wrapped back up and seems to keep forever. It will grow another coat of mold.

Jim Notes
The big problem with all meats of this type is the salt. This recipe originally called for granulated “cattle salt.” This is a rather crude form of salt that used to be used to “salt cattle” in the field. It has large crystals, much like a “kosher” salt and a fair amount of water. Thus, there is much less actual salt than one would find in normal fine kitchen salt.
The first time I tried this recipe, I used normal kitchen salt, and the meat was so salty that we could hardly eat it, even after it had been soaked in several changes of water.
The next time, I got some real cattle salt at the local farm store, and it worked quite well. The next time, however, when I went to get some salt, they had only the salt in big blocks. I tried kosher salt and reduced the amount too much. The ham was delicious, but I was unsure about how long it would keep. I resalted it, and still have some after several years.
Summary, use a little less than 2 cups of kosher salt if you can’t get real cattle salt.
On the farm in Nicholas Co., W. Va., we always killed the pigs at Thanksgiving. Dad and mother would cut up the meat, and it was generally my job to mix the cure ingredients. I can still feel the salt, sugar and pepper under my fingernails. This gave us much of our meat all winter.
My father always said to be fairly generous with the sugar, and I have done so. I would use maybe 4 tablespoons of sugar, if mother did not catch me. She believed in “going by the book”.
This cured meat is similar to the Italian prosciutto crudo, which is made in much the same way. In some parts of Italy, it is made fairly sweet; in Tuscany, it is salty. It is also made in other parts of Europe, but I don’t know the names used. The Europeans often eat it sliced very thin and uncooked. We always cooked it, either fried or baked. The Italians often use it in small amounts to give a background flavor to sauces of all types. The meat has a fairly strong taste, and a little can go a long way if one is not acclimated.
One can get the finished product smoked, but it doesn’t add much to my taste.
Try to unveil the meat when your wife and family are not around. It is not a pretty sight.
I am sure that my Grandfather McCue would have been amazed if he had known his method was widely used in Italy and Europe.

John Notes: With great joy, I bring you the story of the “Jingly Knife” as told by the adorable Kate, in the center of this photograph.
Dear John,
You are very thoughtful to ask me to write about the knife. It may sound funny to you to hear about the rivalry over the knife but I was very determined not to let Jim have it.
In the photo following the ham I am the little girl with the determined look between Joe and Jim. It was just about at that location there was a dug out area in the lawn called the “chubby hole” and many fusses about who got to sit in it. The chubby hole was a great location to watch for the sisters walking along the road and gossip besides watching for visitors. When Cousin Phoebe visited the farm we would have great disputes over who got to sit in the hole.
John, I really was a pest to your father. Many times I would let go a cry that Jim was getting into my things and some adult, usually his mother, would come and firmly ask “What are you doing to little Cecelia?” and I would just act smug. It is a miracle Jim has been so kind to me over the years. I dearly love him and regret the actions I took against him many years ago…
Dinner for the family was held in the dining room. Place settings for those present for dinner were frequently set by a child. The knife was from the silver service used at the meal. The jingly knife was a dinner knife and the blade was a bit loose inside the handle, hence the jingle.
Some time along the years Jim was given the knife. I don’t know if it came from his parents or from Aunt Beatrice. Your father was very dear to give it to my [daughter] Carrie. Yes, she has the jingly knife.
Thank you so much, Kate! I had never heard about the “chubby hole” before. Gossip about sisters; Oh, my!

Grace McCue Bobbitt’s Fruit Cake

I don’t know where this recipe came from or how much it was modified. Mother used to make it for Christmas presents for her large family. Two or three batches were made every year. After Mother died in 1970, I continued her custom for a couple of years, but gradually concluded that most people really did not like fruit cake very well anyway. Since then, it has mostly been made in conjunction with my cousin, Cecelia Kate Mahood Riggins.
Ingredients
- 1 lb butter at room temperature
- 1 lb brown sugar
- 9 eggs
- 2 teaspoons milk (that’s right, 2 teaspoons, but it sure sounds silly to me)
- 1 teaspoon baking soda
- 2 teaspoons cinnamon
- 2 teaspoons mace
- 4 cups flour
- 1 lb candied citron
- 3/4 lb candied orange peel
- 3/4 lb candied lemon peel
- 3/4 lb candied pineapple
- 3/4 lb candied cherries
- 3/4 lb chopped dates
- 2 lb currents
- 2 lb raisins
- 1 lb chopped almonds, 1 lb in shells (NOT POWDERED ALMONDS), 1 lb English walnuts, 1 lb in shells
- Sift the flour, soda, and spices together.
- Mix all of the fruits and nuts. Sift the flour mixture over them and stir to coat. This is a mess. It can only be done with hands in a large container.
- Cream the butter. Mother used her hands, but I use a mixer with a beater blade. Add the brown sugar and cream together.
- Separate the eggs and beat the whites until they are dry. Beat the yellows until they become bright yellow (I wonder why they turn so yellow and why it is necessary).
- Lightly grease four bread pans (Crisco) and line them with waxed paper, leaving at least two inches of waxed paper outside of the pans all around.
- Gently blend the beaten egg yellows and whites together; add the milk and combine with the fruit-nut mixture. Mix everything until the mixture is more or less homogeneous. This is now a real mess and, again, must be done with hands. Divide the dough between the pans. There should be at least an inch of clearance between the top of the dough and the top of the pan because the cakes will rise some. Scrape as much batter as possible out of the mixing pan and use it to smooth the tops of the cakes. Decorate them if you wish.
- Place a layer of waxed paper over the pans and tie it down all around with string. Steam the cakes for 3-1/2 hours. Any large pot will suffice. It would be best if the cakes could be fitted in one layer, but we usually stack them on top of one another because we don’t have a pan with a large flat bottom. Sometimes, the cakes rise into the one stacked on top, but that doesn’t change the flavor. Mother used her copper wash boiler which we still have, but it has sprung a leak (now fixed–$80).
- Take the cakes out and remove the waxed paper. Place them in an oven at 300° for 30 minutes to dry them out a bit.
- Store in a closed container with bits of apple for a few weeks. Actually, they are very good without this step, but tradition is tradition!
Jim Notes
In earlier times, mother always insisted that the candied fruit should be bought in large pieces and cut up just before putting it into the mix. In later years, dad revolted, and the previously cut-up pieces were used. Needless to say, I have always used cut pieces.
The recipe was a little vague on the nuts, mainly on whether the amounts were for in-the-shell nuts or shelled. We have used the in-the-shell amounts, but it doesn’t seem to make a major difference. A few more or less doesn’t seem to be important. Mother also suggested black walnuts, but we have never had enough to use them.
Contrary to many fruit cake recipes, this one contains no liquor. I like fruit cake, and I like booze, but not mixed together.
Mother kept out pieces of the various candied fruit and nuts and decorated her cakes beautifully. They looked nice, but didn’t taste any better. I don’t worry about it, but Cousin Kate insists when we make them together.
The cake is very rich. Serve thin slices and let people come back for more. Don’t give them to anyone who doesn’t like fruit cake. It is too much trouble to make them.

Mother B’s (Grace McCue Bobbitt) Corn Bread
To me, a large thick piece of dry cornbread can be an abomination, even when there is enough butter to sort of make it slide down. Dryness in a thin piece with a good crust is tolerable, but just. Perhaps this is because I grew up on this cornbread recipe. I don’t know where it came from, but it is lovely and moist, verging almost on a spoon bread. Still, it has a nice crust. My father had to work Saturday morning, and nothing pleased him more than cornbread for lunch when he got home in the winter and before his nap.
Ingredients
- 1 egg, beaten
- 1/4 cups sugar
- 1 teaspoon salt
- 1 cup cornmeal
- 1-1/2 cups buttermilk
- 3/4 teaspoon baking soda
- 1 tablespoon melted butter (in baking dish)
- Combine the beaten egg, sugar, salt, cornmeal and buttermilk, and beat it well.
- Add the baking soda and pour it into a Pyrex dish containing 1 tablespoon of melted butter. A 9 X 5 inch Pyrex dish is traditional).
- Bake at 425° until nice and brown, approximately 35 minutes.
Jim Notes
Although it is hard to believe, this is good as a warmed leftover. It retains its moisture very well.
We still have the Pyrex dish that mother always used. Whether it contributes to the flavor or not, we don’t know.
At one time, mothers of high school students took turns coming in to help serve the hot lunches. One time, I told the serving lady that I “only liked my mother’s corn bread”. Of course, she told mother who was mortified. I never could understand why she was so upset.

Guittard Chocolate Chip Bars
This has got to be the shortest and easiest way to a type of chocolate chip cookie. It came from the package of a 10-lb bag of Guittard Chips that we picked up from Sam’s Discount Warehouse for something like $13.
Ingredients
- 2-1/4 cups all-purpose flour
- 1 teaspoon baking soda
- 1 teaspoon salt
- 1/2 lb. butter, at room temperature
- 3/4 cups white sugar
- 3/4 cups of brown sugar
- 2 large eggs
- 1 teaspoon vanilla
- 3 cups of Guittard chocolate chips
- 1 cup of walnuts-optional
- Combine the flour, soda and salt in a bowl and mix well.
- Cream the butter and add the sugars. I use a standard Kitchenaid mixer with the batter paddle.
- Add the eggs and vanilla and mix well.
- Add the flour mixture in small amounts and mix, but not too well.
- Add the nuts and chocolate chips and mix gently.
- Press into a large, well buttered, flat cookie pan with a raised edge. The only way to do this is with your hands.
- Bake in a preheated 375° oven for about 20 minutes or until a toothpick comes out clean.
- Allow the cake to cool and cut up into any size bars that your conscience and waistline may allow.
Jim Notes
There are really only two hard parts to the recipe. The first is pushing the thick dough into the pan. The second is finding the chocolate chips in the basement!
Grace’s Chocolate Cake
Dark Part
- 1/2 cup cocoa
- 1/2 cup milk
- 1/2 cup sugar
Cook this mixture until like fudge and cool, but not so much as fudge. Just melt together and cook for about 5 minutes.
Light Part
- 1/2 cup butter
- 1 cup sugar
- 3 whole eggs
- 1/2 cup milk
- 2 cups flour
- 1 teaspoon soda
- 1 teaspoon vanilla
Combine the dark and white parts, place in a 13″ x 9″ pan, and bake at 350 degrees.
Fudge Icing
- 2 cups sugar
- 4 Tablespoons cocoa
- 2/3 cup milk
- walnut sized chunk of butter
- 1 teaspoon vanilla
Cook until soft ball stage. Cool and add butter and vanilla.
Jane Notes
When we were first married in 1952, Jim’s mother often made a chocolate cake that was much enjoyed and admired. She could produce it very quickly when requested.
She gave us the recipe and back in Columbus we tried to make it and met with repeated failure. We checked that the recipe was correct and she assured us it was. I was looking through her clippings the other day, in 2020, and decided to try once more. It is great. Maybe it takes maturity. This is how she gave it to us.
Directions are sparse, but that adds to the mystery.


The following recipes were added to this cookbook by a son who has his own agenda!
Oatmeal Crispies
Ingredients
- 1 cup shortening
- 1 cup brown sugar
- 1 cup white sugar
- 2 eggs, well beaten
- 1 teaspoon vanilla
- 1-1/2 cups flour
- 1 teaspoon salt
- 1 teaspoon soda
- 3 cups quick oatmeal
- 1-1/2 cups walnuts or coconut or both
- Cream shortening and sugar.
- Add sifted flour, salt, and soda.
- Add oatmeal and nuts.
- Mix well.
- Shape in blocks on wax paper and place in the refrigerator (I freeze).
- Slice thin and bake 350° 10 mins. or until done.
Pecan Pie
(From Lou Dean)
Ingredients
- uncooked pie shell
- 3 eggs
- 1 cup dark Karo syrup
- 1/2 cup sugar
- 1 teaspoon vanilla
- 4 tablespoons (1/8 lb.) butter
- 1 cup pecan halves
- Melt butter.
- Stir eggs with fork until yolk is well distributed (don’t beat).
- Add Karo, sugar, and vanilla.
- Pour into the crust.
- Pour melted butter over this mixture.
- Drop pecans into butter.
- Bake for 40-45 min in a 350° oven.
John Notes
There is a version of this pie that utilizes black walnuts, is rich as Bill Gates, and melts in your mouth.
Snickerdoodles
A wonderful cookie that is as much fun to say as it is to eat (well, almost.)
Makes 5 dozen cookies
Ingredients
- 2-3/4 cups flour
- 2 teaspoons cream of tartar
- 1 teaspoon baking soda
- 1/2 teaspoon salt
- 1 cup soft shortening
- 1-1/2 cups sugar
- 2 eggs (unbeaten)
- Sift together flour, cream of tartar, baking soda, and salt.
- Cream together shortening, eggs, sugar. This should be light and fluffy.
- Beat in flour mix.
- Chill until easy to handle.
- Form into walnut sized balls.
- Roll in 2 tablespoons sugar and 2 tablespoons cinnamon.
- Put on an ungreased sheet pan.
- Bake 8 mins at 375 °.
Green Bean Casserole
from Yvonne – 1971
Ingredients
- 1 large can green beans
- 1 green pepper chopped
- 2 onions chopped
- 1 cup chili sauce (Heinz)
- 1 tablespoon butter
- 1 tablespoon sugar
- Put bacon strips on top.
- Bake 1-1/2 hours at 350°.
Serves eight.
Mother B’s Applesauce Cake
Ingredients
- 1/4 cup butter
- 1 cup white sugar
- 1 egg (s)
- 1 cup flour
- 1 teaspoon salt
- 1 teaspoon soda
- 2 teaspoons cinnamon
- 2 cup chopped raw apples
- 1/2 cup nuts
- Cream butter and sugar together, add an unbeaten egg.
- Beat well.
- Add dry ingredients.
- Mix, then add apples and nuts.
- Using an 8″ square pan, bake at 325° for 40 minutes until done.
Fresh Cranberry Sauce
Ingredients
- 1 lb. fresh, washed cranberries
- 3/4 cup orange juice
- 1 tablespoon orange zest
- 1-1/2 cup sugar
- Combine in 3-qt. casserole, stirring to dissolve the sugar.
- Cover with lid or vented plastic wrap; cook on HIGH for 8 minutes or until berries pop and mixtures boils, stirring twice.
- Let stand for 10 minutes.
- It can be stored in the refrigerator for up to 4 weeks.
Yield: 4 cups.
Dipping Sauce for Lobster (and other seafood)
Amount for one person
Ingredients
- 1 tablespoon soy sauce
- 1 tablespoon sugar
- 1 tablespoon vinegar
- 1/4 teaspoon sesame oil
- 1 teaspoon green onion, chopped
- 1 teaspoon ginger, minced
Not usually included: 1 teaspoon red bean curd and 1/4 teaspoon red pepper oil.
Painted Cookies (Glazed Fresh Apple Cookies)
These are possibly the best cookies known to mankind. At least they have my vote!
Ingredients
- 2 cups flour
- 1 teaspoon soda
- 1/2 cup shortening
- 1 cup brown sugar
- 1/2 teaspoon salt
- 1 teaspoon cinnamon
- 1 teaspoon cloves
- 1/2 teaspoon nutmeg
- 1 egg unbeaten
- 1 cup nuts, chopped
- 1 cup apple, finely chopped
- 1 cup raisins
- 1/4 cup milk
- Mix flour and soda.
- Combine shortening, brown sugar, salt, cinnamon, cloves, nutmeg, and egg.
- Stir in half of the flour mix.
- Add apples, nuts and raisins, then milk and rest of flour mix.
- Drop on cookie sheet. Bake for 11-14 minutes in a 400° oven.
- While warm, spread with the frosting mix (below).
Frosting mix for painted cookies
Ingredients
- 1-1/2 cups powdered sugar
- 1 tablespoon butter
- 1/4 teaspoon vanilla
- 1 teaspoon salt
- 2-1/2 tablespoons light cream
Pecan Sticks
Cream 1 cup butter and 1 cup brown sugar
Add one egg, 1 tsp Vanilla, and 2 cups flour
Spread on a cookie sheet
Brush with 1 egg
Sprinkle with 1/2 cup brown sugar, 1 cup pecans, and 1/2 cup brown sugar (in that order!)
Bake for 30 min. at 350 degrees
Cut while warm
Dilly Bread
This is an old family favorite, recently remembered by sister Annie, who inspired a search for the recipe. It is on-line, with some differences, on the Pillsbury web site, but here is the original recipe my dear wife found, copied into her collection with my mother’s original notes.
Ingredients
- 1 packet yeast
- 1/4 cup warm water
- 1 cup creamed cottage cheese, heated to luke-warm
- 2 tablespoons sugar
- 1 tablespoon instant minced onion
- 1 tablespoon butter
- 2 teaspoons dill seed
- 1 teaspoon salt
- 1/4 teaspoon soda
- 1 unbeaten egg
- 2-1/4 to 2-1/2 cups All-Purpose flour
- Soften yeast in water.
- Combine softened yeast in a mixing bowl with cottage cheese, sugar, onion, butter, dill seed, salt, soda, and egg.
- Add flour gradually to form a stiff dough, pausing to beat well after each addition.
- Cover and let rise for 50 to 60 minutes in a warm place (85 to 90 degrees Fahrenheit) until dough is light and doubled in size.
- Stir down the dough.
- Turn into a well-greased 8 inch round casserole of 1-1/2 or 2 quart capacity.
- Let rise for 30-40 minutes in a warm place until light.
- Bake at 350° for 40-50 minutes until golden brown.
- Brush with soft butter and sprinkle with salt.
Yield: one round loaf.
Lisa & Cecilia Hickman’s Texas Sheet Cake
- Bring to boil 2 sticks of oleo margarine, 1 cup water, and 4 Tbsp cocoa.
- Remove from heat and add 2 cups flour, 2 cups sugar, 1/2 tsp salt.
- Beat in 2 eggs, 1/2 cup sour cream, and 1 tsp baking soda.
- Pour into a greased 10″ x 15″ pan. Bake at 375° for 20-22 minutes.
Frosting
- Bring to boil 1 stick oleo margarine, 4 Tbsp cocoa, and 6 Tbsp milk.
- Remove from heat and add 1 lb. box powdered sugar, 1 tsp vanilla, and 1 cup chopped nuts.
- Spread on the cake as soon as it leaves the oven.
Lisa Notes
You won’t eat it every day. It also freezes well. My mom used to cut it into individual pieces to freeze. My teacher friends, long retired, still talk about loving when I brought this dessert to [school] functions.
Victorian Egg Board Pavlova
The Victorian Egg Board was an Australian marketing council, and this recipe used 6 of their frozen egg whites.
Ingredients
- 6 frozen V.E.B. egg whites
- 1.2 cups (9 ozs.) castor sugar
- 1 tsp. corn starch
- 1 tsp. vanilla
- 1 tsp. vinegar
- Line 2 scone trays with greaseproof paper.
- Grease 2 springform rings and invert onto scone trays.
- Pour thawed egg whites and a pinch of salt into a warm dry bowl and beat for two minutes.
- Add castor sugar a spoonful at a time taking about three minutes.
- Then continue beating whilst adding corn starch, vanilla, and vinegar.
- Divide mixture between two pans.
- Bake at 250° (electric) or 225° (gas) for 1-1/2 hours.
- Cool Pavlovas on a wire cake cooler. When cold, peel off paper.
- Sandwich together with cream and any desired filling (chocolate, lemon custard, orange marmalade, etc.)

Here is some information about the locations mentioned in this Cookbook.
My parents read a LOT, and shared that love with all of their children. I am working on putting together a list of my father’s favorites, Papa Books.

